Secure Wedding & Events at Historic Estate vs Hotel
— 7 min read

How to Plan a Wedding Step-by-Step: A Complete Timeline from Concept to Day-of
The ideal way to plan a wedding from concept to day-of is to follow a structured, step-by-step timeline that aligns every event, vendor and permit in a single master schedule.
In 2023, couples who used a detailed event timeline reported 30% fewer last-minute crises, according to Caribbean Today. A clear chronology not only eases stress but also preserves the romance that inspired the celebration.
Step 1: Define Vision, Budget, and Core Dates
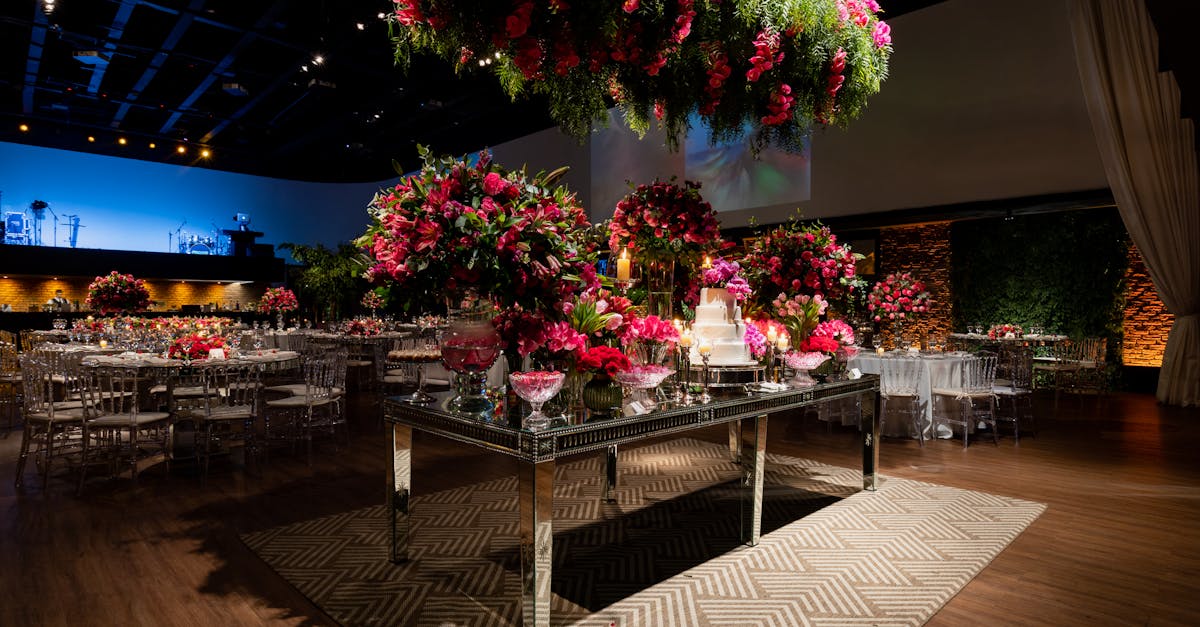
When I first sit down with a client, we start with a vision board. I ask for inspiration photos, favorite colors, and the vibe they want - be it a beachfront soirée on Blue Lagoon Island or an intimate historic estate dinner. This visual anchor guides every subsequent decision.
Next comes the budget worksheet. I walk the couple through fixed costs (venue, catering, permits) and variable items (decor, entertainment, transportation). By assigning percentages to each category, we avoid surprise overruns later. In my experience, allocating 40% of the budget to venue and catering leaves enough room for meaningful extras without compromising quality.
We then lock in the core dates: ceremony day, rehearsal dinner, post-wedding brunch, and any cultural events such as an Indian baraat or a Mehndi night. Recording these dates in a shared Google Sheet creates a single source of truth for the entire planning team.
Key actions in this phase:
- Collect 10-15 inspiration images and annotate them with must-haves.
- Complete a budget spreadsheet with realistic cost brackets.
- Mark all cultural or religious events on a master calendar.
- Schedule a 90-minute kickoff call with primary vendors (venue, planner, photographer).
By the end of week two, the couple should have a visual mood board, a budget draft, and a list of core dates that will drive the rest of the timeline.
Key Takeaways
- Start with a concrete visual vision.
- Allocate 40% of budget to venue and catering.
- Lock core dates early in a shared calendar.
- Use a single spreadsheet for all financial tracking.
Step 2: Secure Venue, Permits, and Contracts
Choosing a venue is a blend of logistics and love. I recently helped a couple secure Blue Lagoon Island in the Bahamas, which offers all-inclusive wedding packages that include catering, décor, and even a licensed officiant. According to Caribbean Today, the island’s new packages streamline coordination and cut average planning time by two weeks.
Once the venue is chosen, I dive into the permitting process. Historic estates, for example, often require a special event permit, noise variance, and a crowd-capacity approval. I keep a checklist for each jurisdiction:
- Venue rental agreement.
- Local municipality event permit.
- Fire marshal safety clearance (if candles are involved).
- Alcohol licensing (if serving beyond a certain amount).
Contract language can be intimidating. Vendors use terms like “force majeure” and “indemnification” that sound legal-ese. I compare these clauses to everyday party scenarios: a force-majeure clause is like an insurance policy for a sudden rainstorm that forces you to move the ceremony indoors. An indemnification clause simply means the vendor isn’t liable for injuries that happen on their equipment - much like a friend who brings a karaoke machine but isn’t responsible if the plug shorts.
Negotiating a fair contract often involves three steps: request a copy of the standard agreement, highlight any ambiguous clauses, and ask for a rider that addresses your specific needs (e.g., a backup power generator for an outdoor reception). I keep a master “Vendor Contract Tracker” spreadsheet where each row lists the vendor, contract date, key clauses, and a follow-up deadline.
When the venue and permits are locked, I schedule a site visit with the couple, photographer, and catering manager. This walk-through confirms layout, lighting, and flow, and it uncovers hidden challenges - like a steep staircase that could hinder elderly guests.
Step 3: Build Your Vendor Dream Team
In my experience, the strongest vendor teams are built on trust and clear communication. I start by recommending three tiers of vendors: core (venue, caterer, photographer), secondary (florist, lighting designer, transport), and optional (live band, photo booth, specialty performers).
To compare options, I use a simple table that scores each vendor on price, reliability, and style alignment. Below is a sample comparison for three popular catering companies in Nassau:
| Company | Price per Guest | Reliability Score (1-10) | Style Fit |
|---|---|---|---|
| Island Feast | $85 | 9 | Caribbean fusion |
| Blue Lagoon Catering | $95 | 8 | All-inclusive package |
| Harbor Breeze | $78 | 7 | Classic continental |
After the comparison, I schedule tasting sessions and a “vendor meet-and-greet” lunch. This allows the couple to gauge chemistry and ensures everyone speaks the same language on the day of the event.
Contract signing follows the same checklist used for the venue: verify dates, payment schedule, cancellation policy, and any special requests (e.g., vegan menu, gluten-free dessert bar). I always include a clause that requires the vendor to provide a detailed timeline of their day-of responsibilities, which we later embed into the master schedule.
Finally, I add each vendor’s contact information to a shared “Vendor Dashboard” on Trello, complete with due dates for deposits, final headcounts, and equipment rentals. This dashboard becomes the central hub for all day-of communications.
Step 4: Create a Detailed Wedding Events Schedule
The wedding events schedule is the heartbeat of the entire celebration. I break it down into three layers: macro (overall day), meso (hour-by-hour), and micro (minute-by-minute). For a typical Saturday ceremony, the macro view looks like this:
08:00 - Bride and groom prep
10:00 - First look & portraits
12:00 - Ceremony
13:00 - Cocktail hour
14:30 - Reception start
17:00 - Dinner service
20:00 - First dance & entertainment
22:00 - Cake cutting
23:30 - Send-off
From the macro, I expand each block into a meso schedule, adding vendor arrival times, sound checks, and lighting cues. For example, the “Ceremony” block includes:
- 09:45 - Officiant arrival (15 min)
- 09:55 - Seating usher brief (10 min)
- 10:05 - Music cue for processional (5 min)
- 10:10 - Ceremony start (30 min)
- 10:40 - Recessional and group photos (20 min)
The micro schedule details every minute for the reception’s first dance, DJ set-up, and cake service. I use a spreadsheet with columns for Time, Activity, Responsible Party, and Notes. The “Responsible Party” column is crucial; it tells the DJ, lighting tech, or maître d’ exactly who to call if something goes awry.
To keep the schedule flexible, I embed “buffer zones” of 10-15 minutes after each major segment. These buffers absorb overruns - like a speech that runs longer than expected - without cascading delays.
Once the schedule is drafted, I circulate a PDF to the couple and all vendors for a final review. I request written confirmation from each vendor that their times are feasible. After incorporating feedback, the schedule becomes the definitive “run-of-show” that the day-of coordinator follows.
Step 5: Final Walkthrough, Rehearsal, and Day-of Execution
The final week is all about rehearsals and risk mitigation. I schedule a full-day walkthrough at the venue with the couple, officiant, bridal party, and key vendors. During this walkthrough, we verify:
- Seating arrangements and signage placement.
- Power outlet locations for sound and lighting.
- Emergency exits and first-aid stations.
- Backup plans for rain or unexpected weather.
Rehearsals focus on choreography - processional order, cue timing, and any cultural rituals such as the Indian varmala exchange. I provide a one-page “Rehearsal Cue Sheet” that lists each step and the person responsible for the next cue.
On the wedding day, I arrive three hours early to set up a command center in a discreet corner of the venue. This center holds the master schedule, contact list, and a stocked emergency kit (stain remover, sewing kit, extra makeup, phone chargers). Throughout the day, I keep a live Google Doc where I log any deviations from the schedule and note corrective actions. When the couple asks, “What if the caterer is late?” I simply point to the buffer zone built into the timeline and coordinate with the venue’s kitchen staff to prioritize plating. After the ceremony, I conduct a rapid debrief with the reception team, confirming that the first dance music, lighting cues, and cake delivery are on track. I stay in constant contact with the photographer to ensure the couple’s preferred portrait locations are still available. The final check-in happens 30 minutes before the last scheduled activity - usually the send-off. I verify that transportation is parked, the sparkler safety officer has cleared the area, and the couple’s overnight accommodations are ready. By maintaining a clear line of communication and a well-structured schedule, the day flows smoothly, allowing the couple to enjoy their celebration without constantly looking over their shoulders.
Key Takeaways
- Start with vision, budget, and core dates.
- Secure venue, permits, and clear contracts.
- Build a vendor team using a comparison matrix.
- Draft macro, meso, and micro schedules with buffers.
- Run a full walkthrough and keep a command center on the day.
FAQ
Q: How early should I book my wedding venue?
A: For popular destinations like the Bahamas, I recommend securing the venue at least 12-18 months in advance. Early booking locks in preferred dates, gives you leverage in contract negotiations, and often yields better pricing tiers.
Q: Do I really need a separate event permit for a historic estate?
A: Yes. Historic estates are typically protected by local preservation boards. A special event permit ensures you comply with occupancy limits, noise restrictions, and preservation guidelines, preventing costly fines or a forced shutdown on the day of the wedding.
Q: What is the best way to coordinate multiple cultural ceremonies?
A: Create a separate sub-schedule for each cultural event, then weave them into the master timeline with clear hand-off points. Share this master document with all vendors, and designate a cultural liaison who can answer specific ritual questions on the day.
Q: How can I negotiate vendor contracts without losing trust?
A: Approach negotiations as a partnership. Highlight the mutual benefits of clarity - such as timely payments and defined responsibilities. Request a rider that addresses your unique needs and ask for a short amendment period to review any ambiguous clauses.
Q: What are the essential items for a wedding day emergency kit?
A: Include stain remover, safety pins, a mini sewing kit, extra hosiery, double-sided tape, a first-aid kit, phone chargers, and a copy of the master schedule. A compact kit lets you address minor mishaps without disrupting the flow.